How many people are looking for crafting in Atlanta? Most people think of Atlanta as more urban/metro, but more and more, crafting is a focus. One of my former co-workers, Liz, is a crafty person. I am sure for some people, that conjures up negativity, but for her, it just means she is always, ALWAYS looking for the next craft project. She can dream up a craft project for anything – even something on the side of the road!
I am not nearly as creative, but we do share a love for crafting! A few weeks ago, she mentioned to me that there was a local shop that offered the opportunity to create a “one word sign” through a short evening class. I was definitely interested, so I told her just to let me know if/when she decided to sign up for it. She signed up a couple of weeks later and sent me an invitation. I registered, with much thought over the “one word” we wanted for a sign in our home. Stay tuned… 🙂
Our Venue
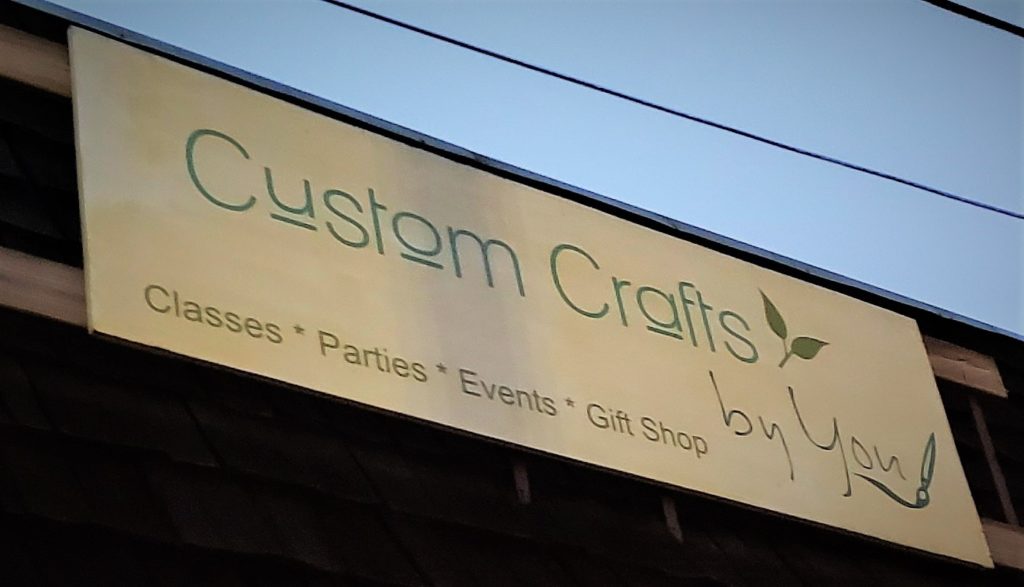
The shop where the class took place is Custom Crafts by You in Tucker, GA. It is in old town Tucker, close to several great restaurants and other shops.
It was a little dusky when we arrived, but I was able to get a somewhat decent photo of the sign.
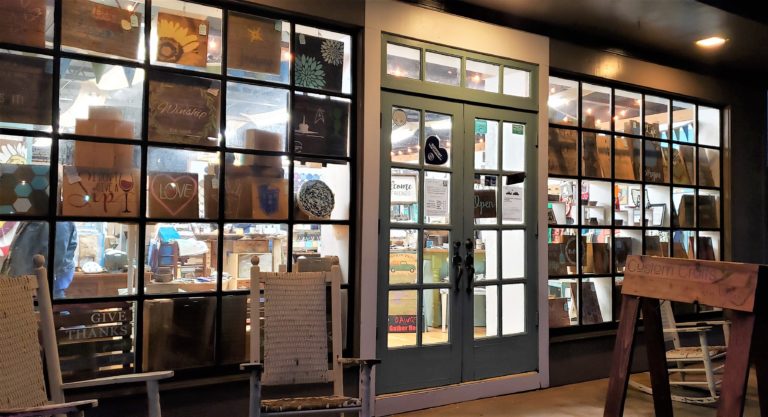
I just loved the way the storefront looked at night! It beckons you in…
Liz had invited me along with two of her neighbors, Barbara and Michelle. You can bring your own drinks and snacks for the evening, and when the ladies arrived, I found that they had indeed done just that! (The garlic cream cheese spread on the gourmet crackers was divine!)
Studio Tour
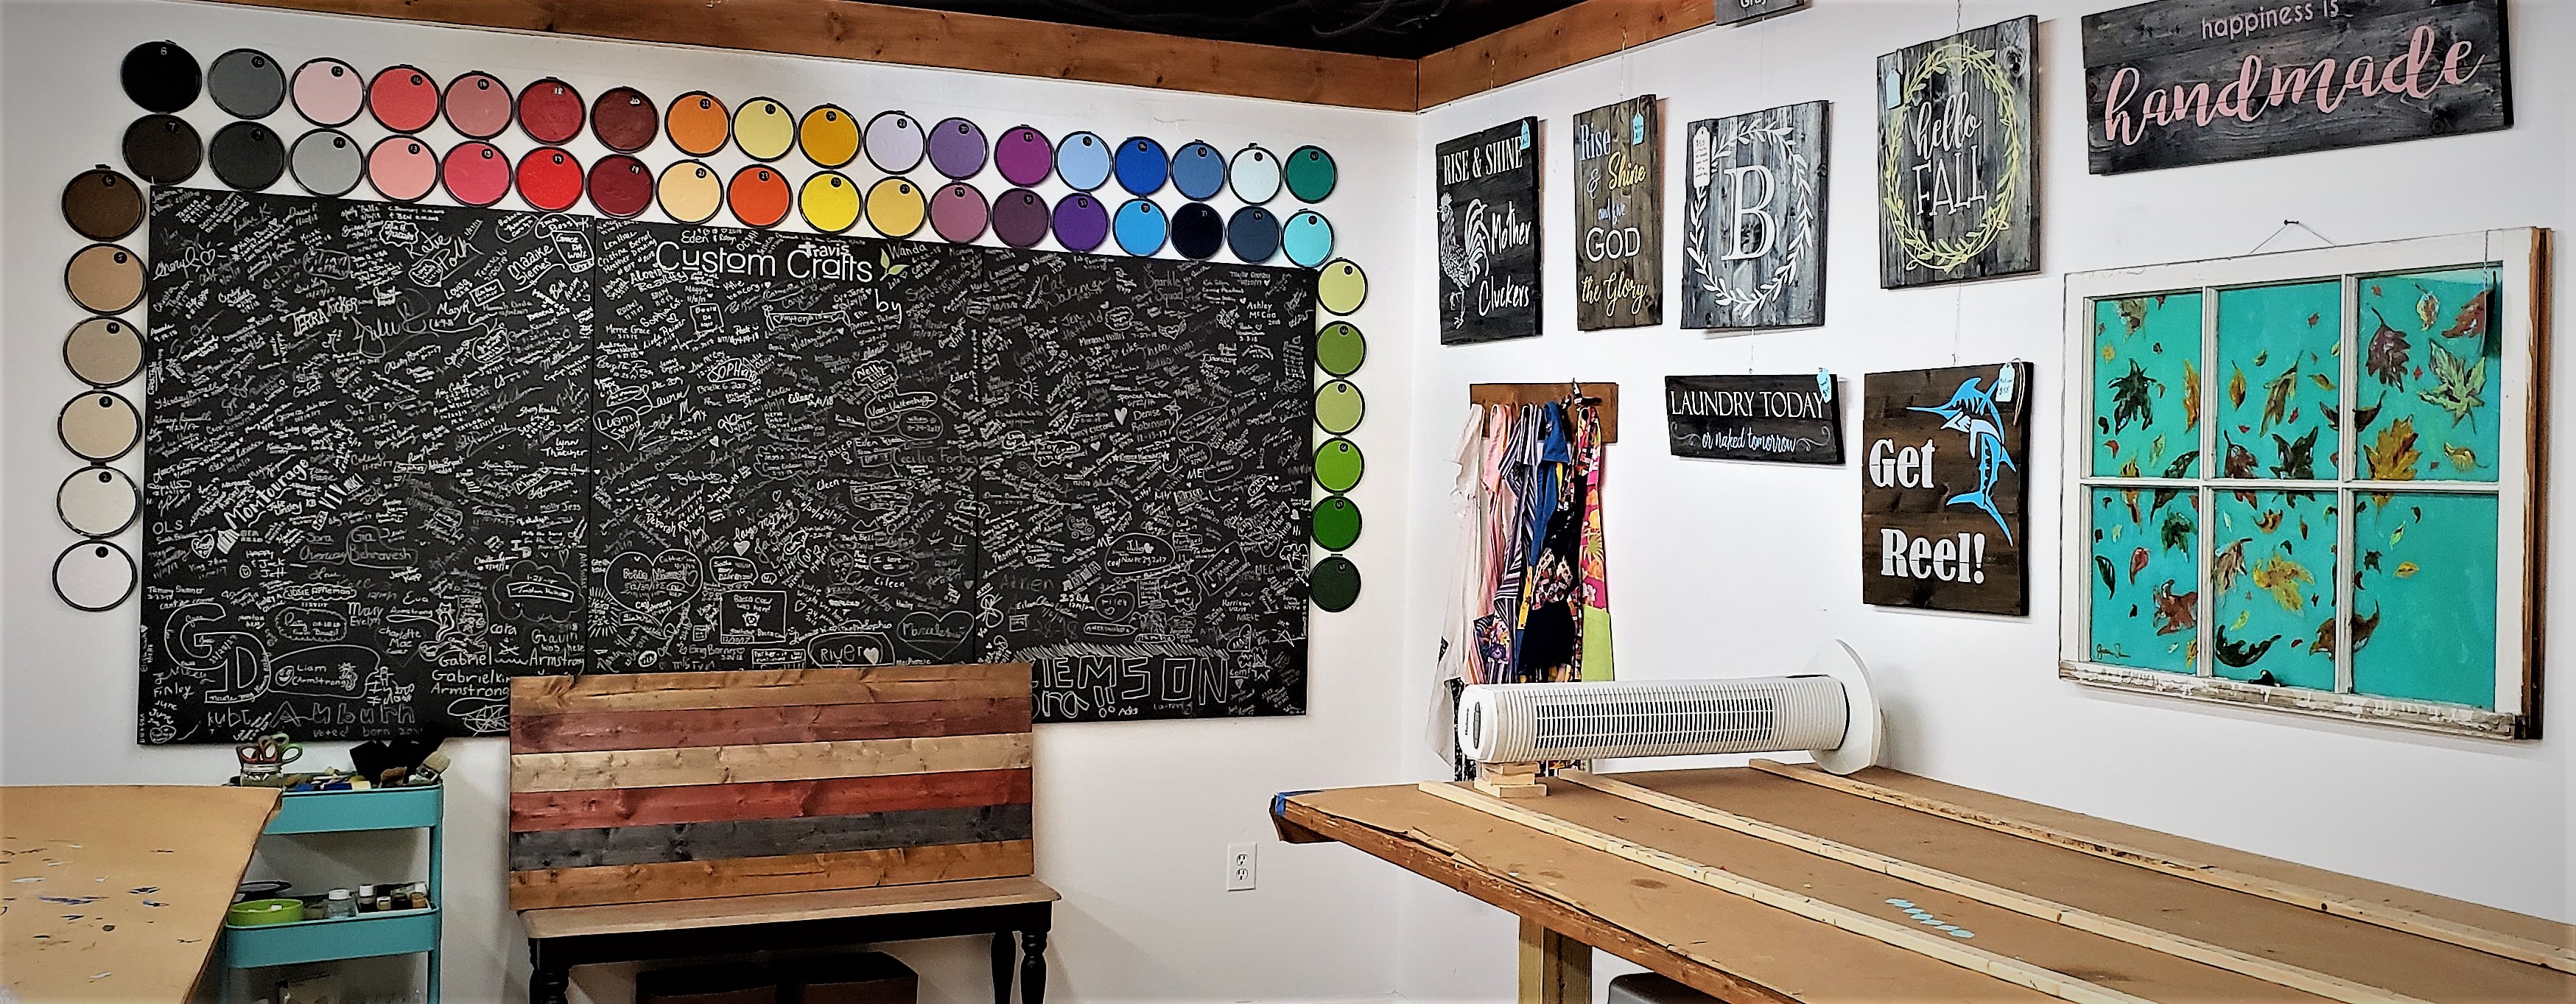
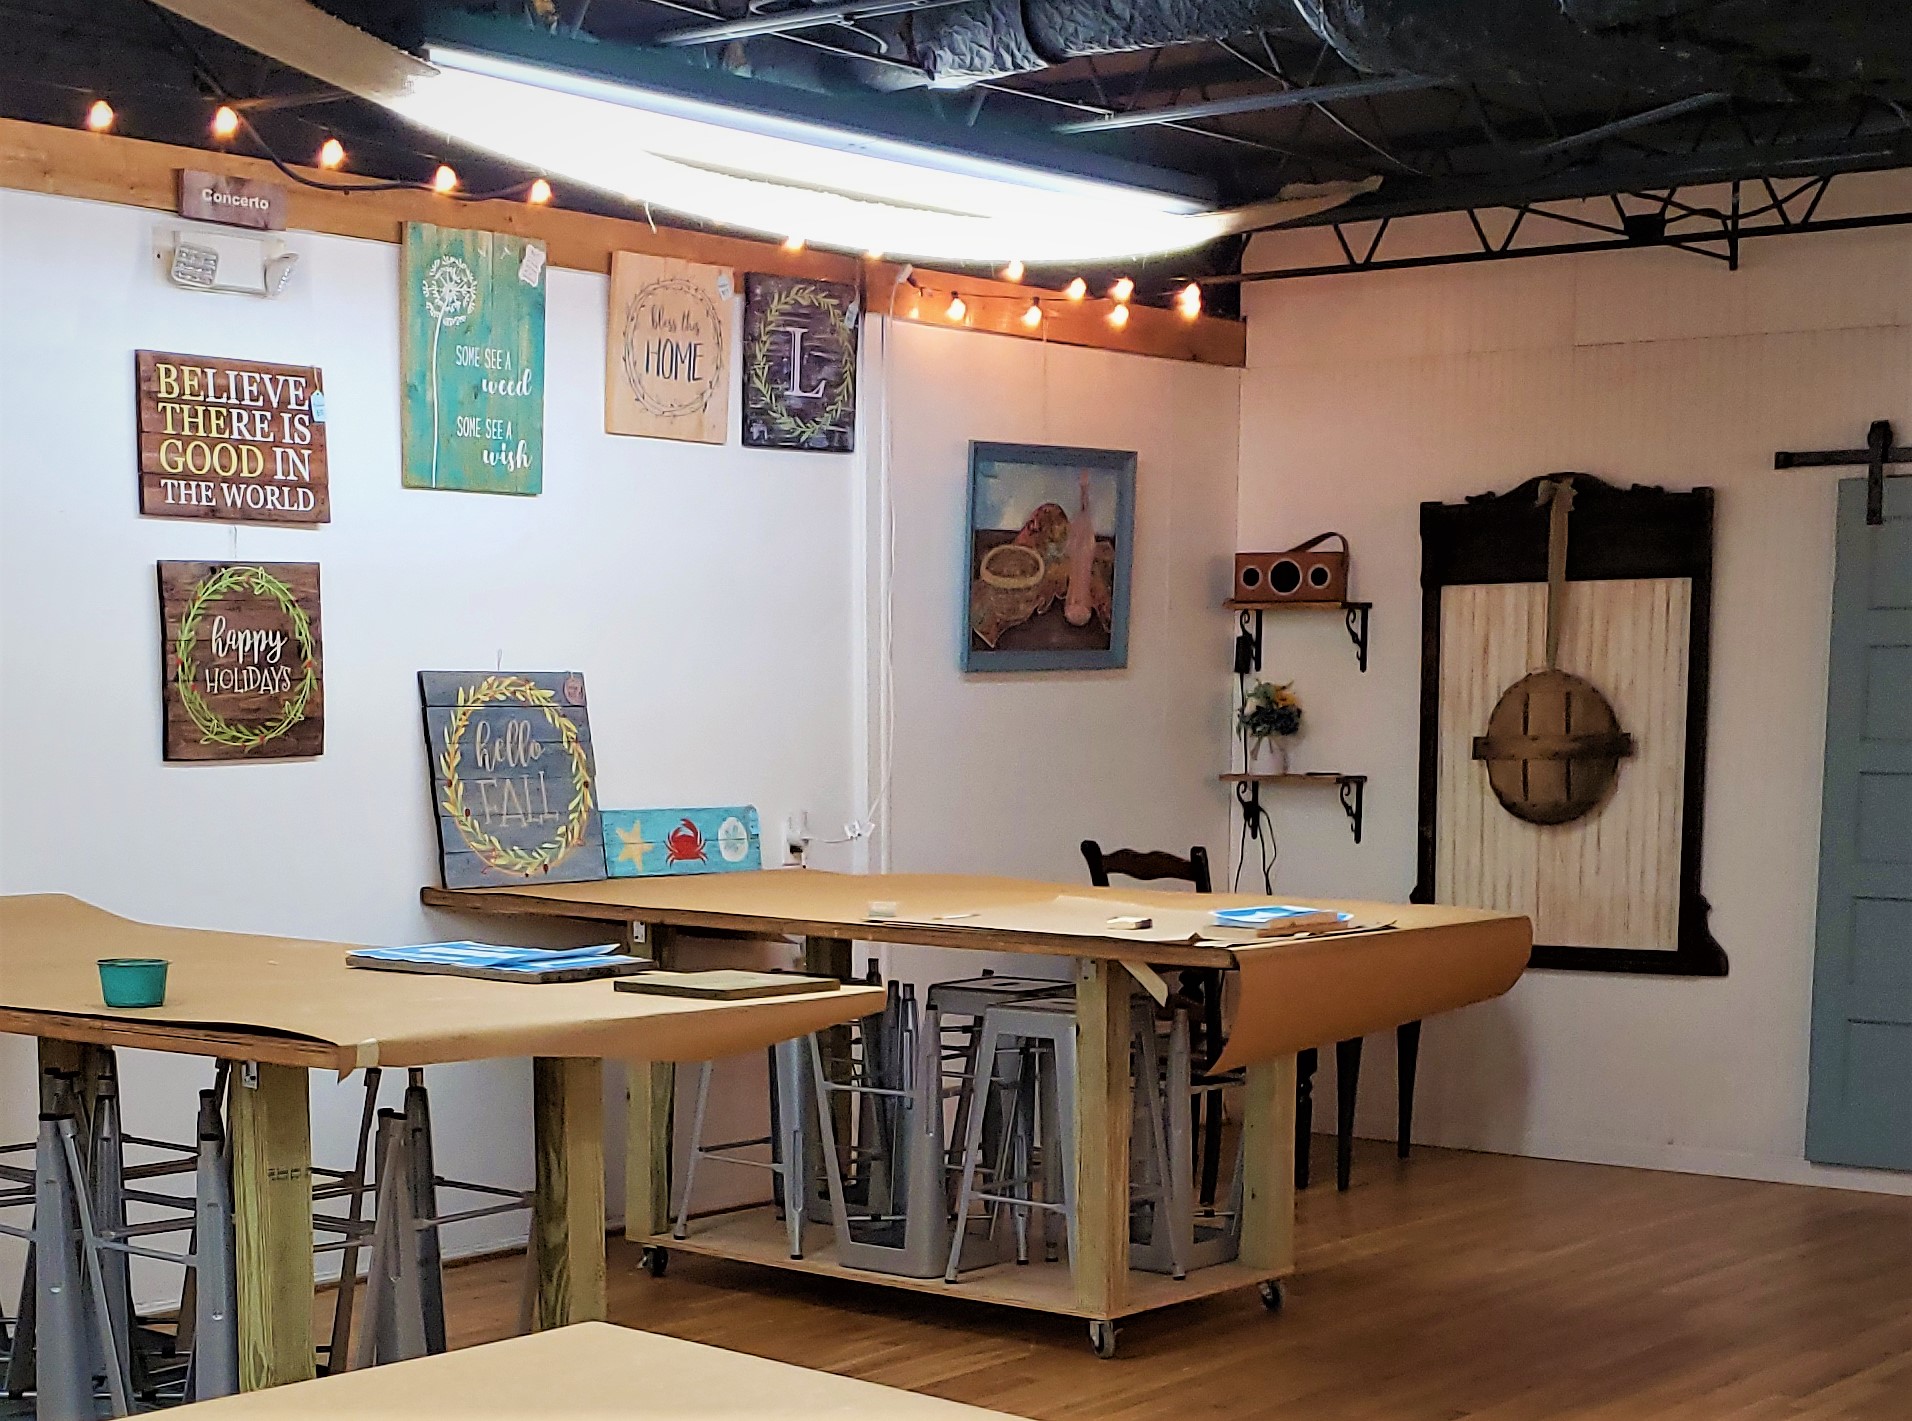
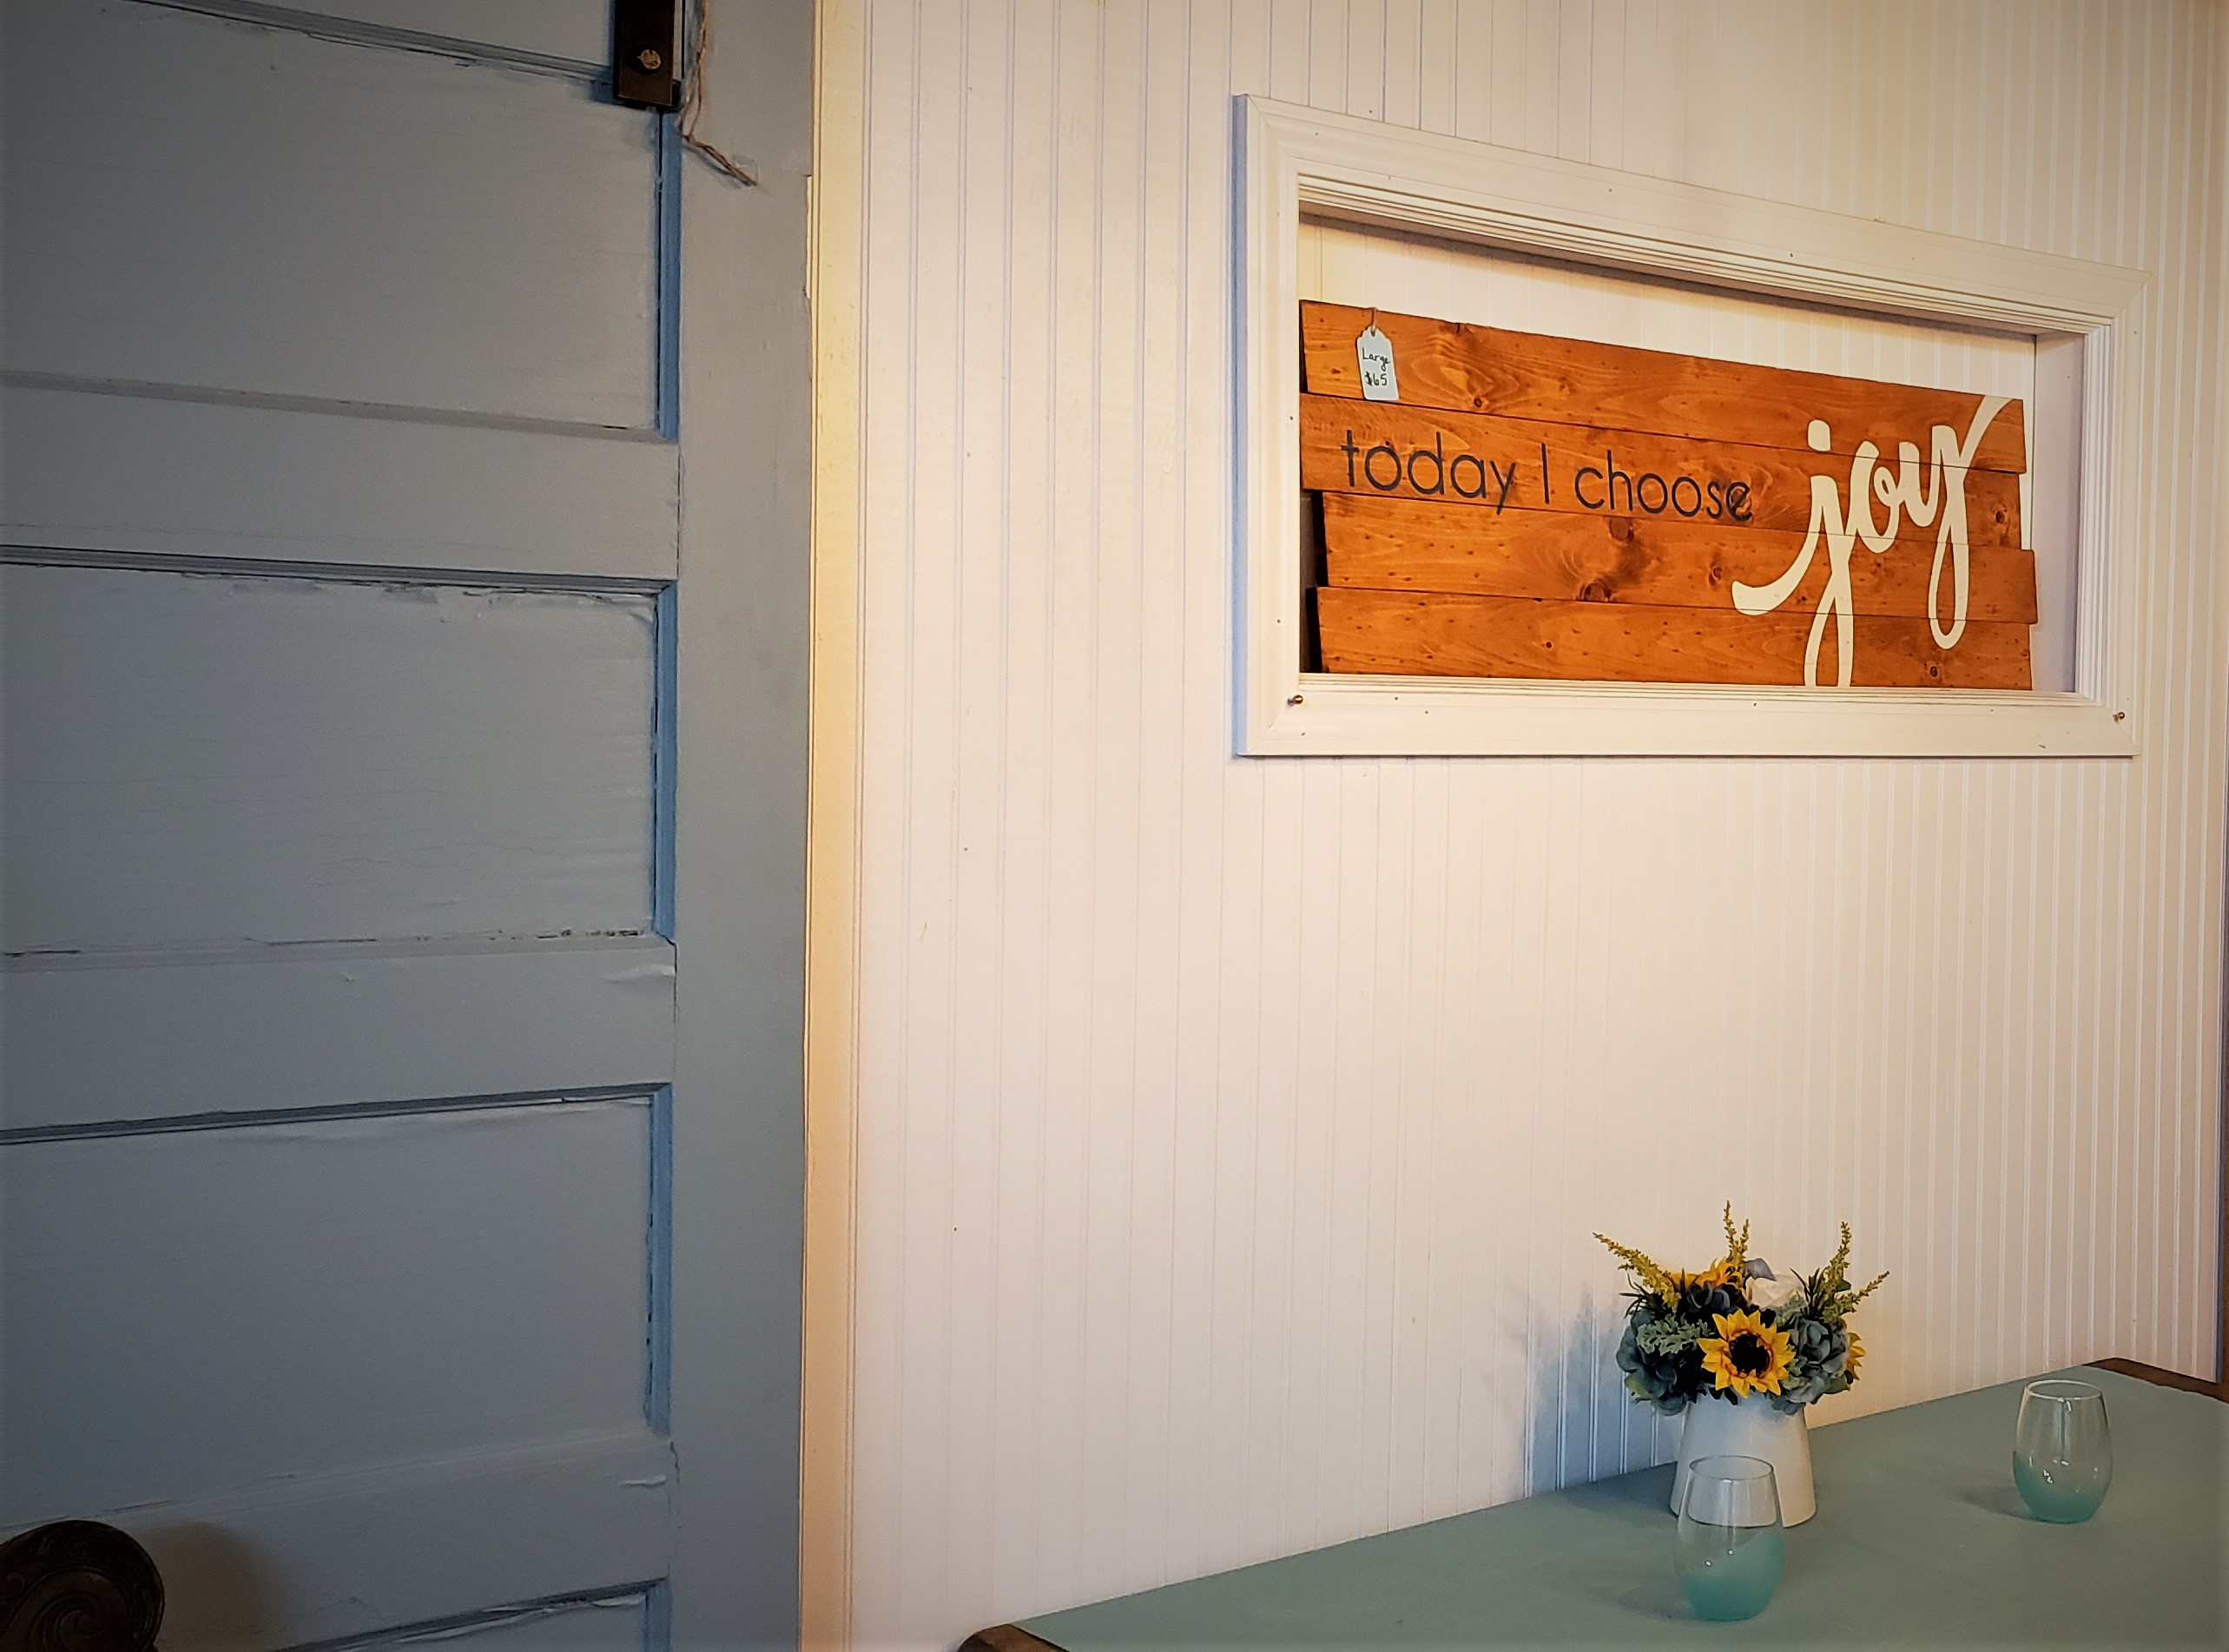
I had a few minutes before the class began to snap a few photos of the studio. In the front of the studio, there is a ton of pre-made artwork that people can purchase. Much of it also serves as examples of the different stain and paint colors on the finished projects and/or inspiration for “crafty” people. While I snapped photos, I chatted with the owner, Michael Smith, who was to be our teacher for the evening. They have their own machine that is capable of crafting any design you can dream of – up to 2 feet wide and as long as the roll of vinyl is made. They have done some rather elaborate projects for people in the past! Crafting in Atlanta can translate to some really custom designs and ingenious outcomes! Click on the thumbnails below to view the larger photo and scroll through the gallery.
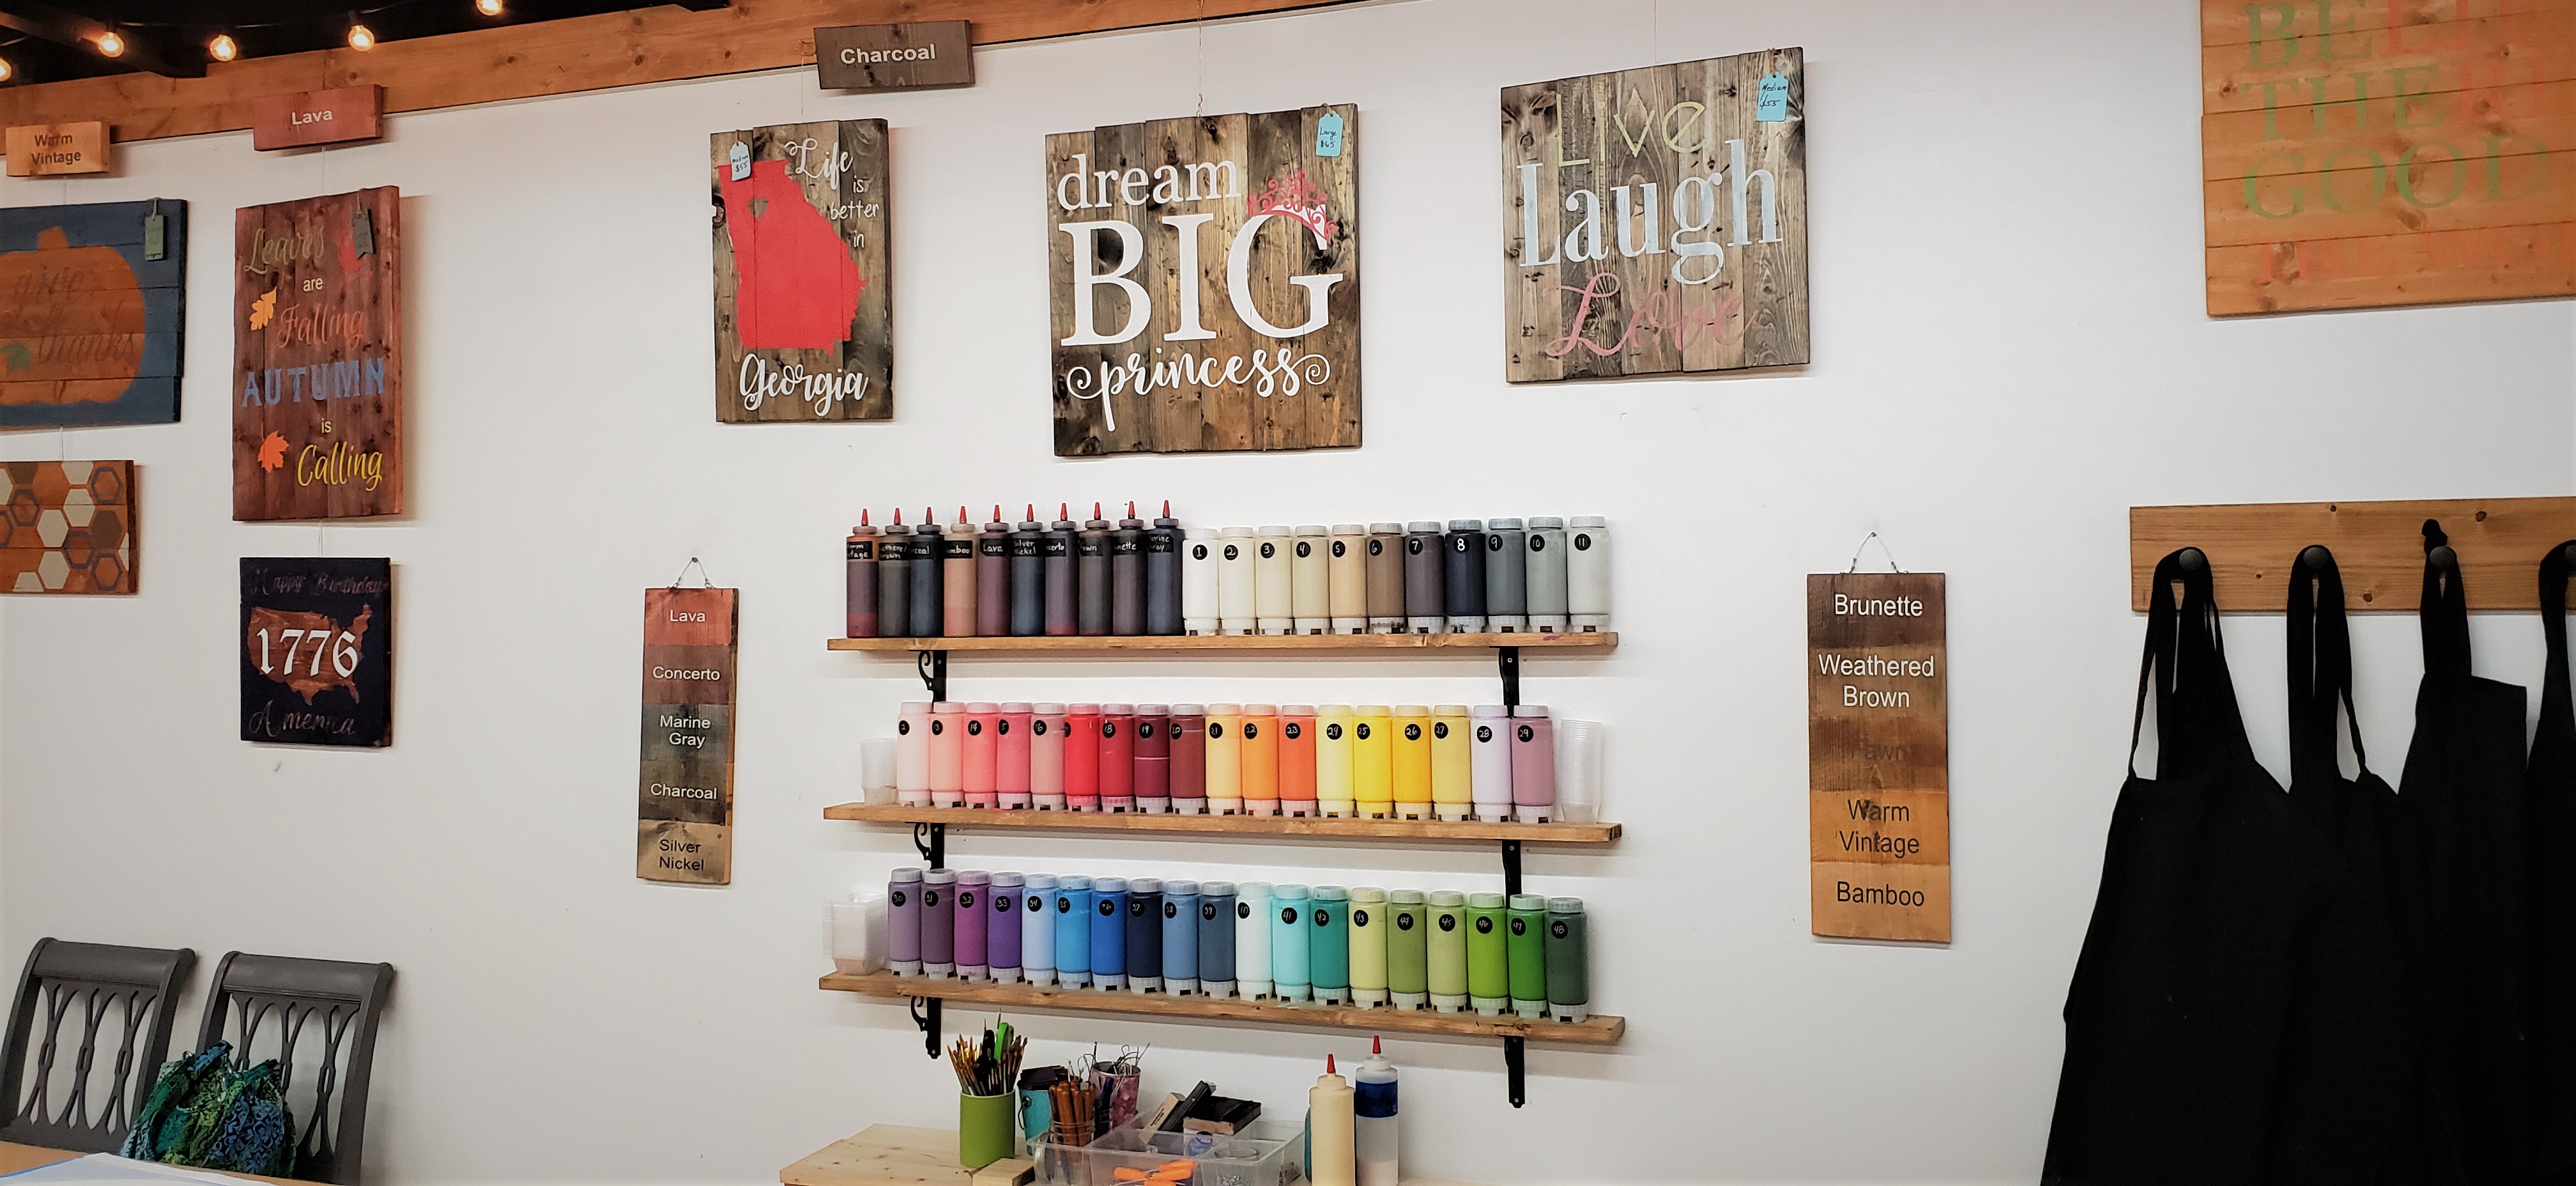
paint color options and board samples
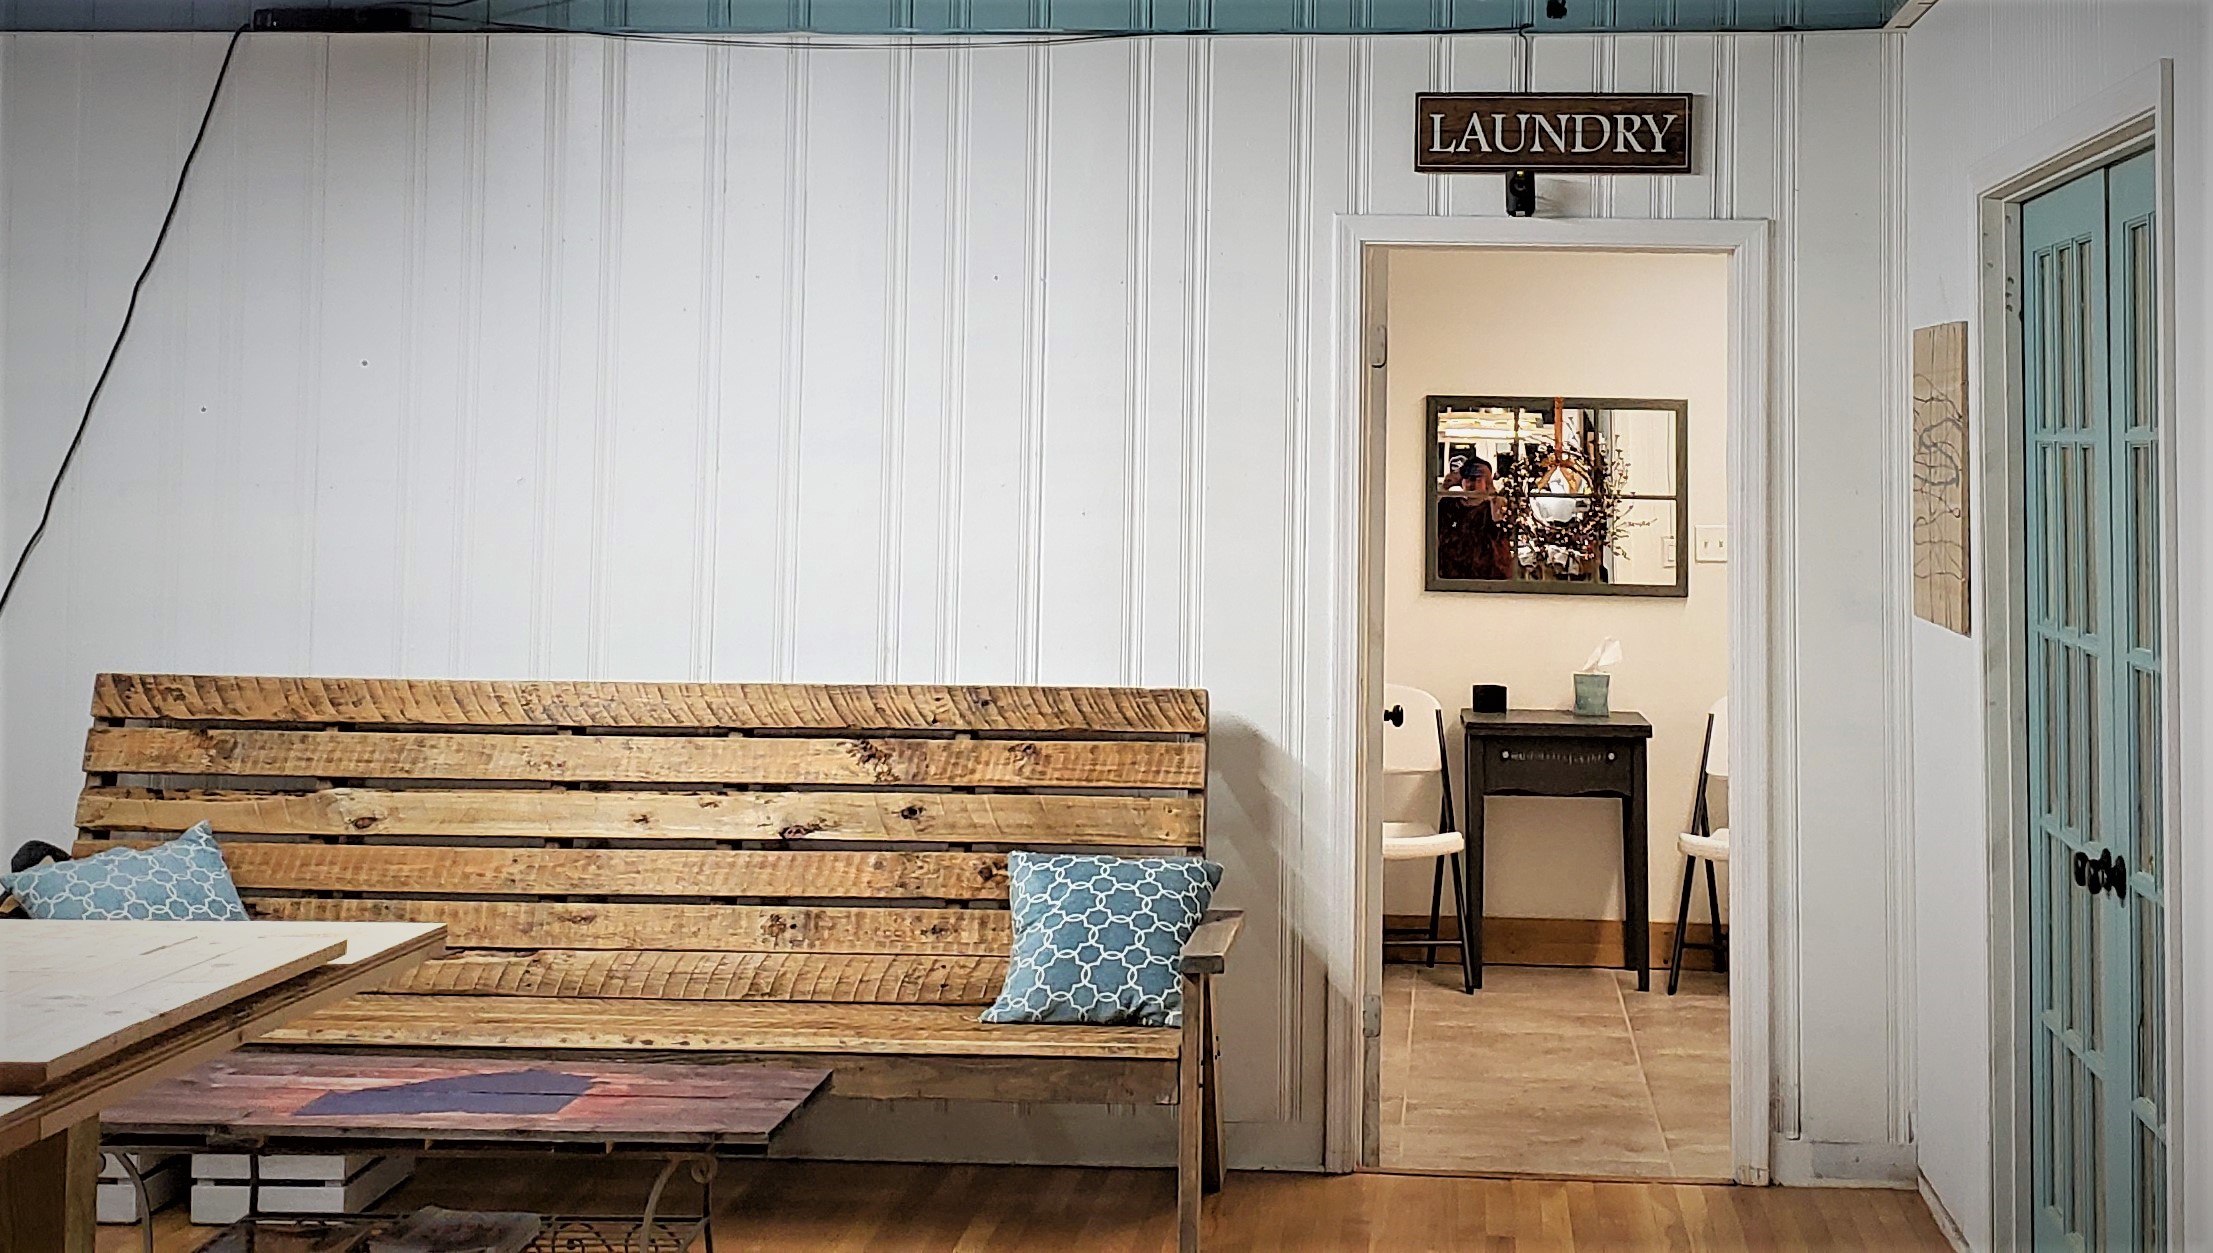
corner of the studio
A great reminder for us all…
This sofa was hand-made from pallets by one of their friends!
stain and paint options
Project Introduction
It was finally time to begin the project, and I had no idea what to expect. I knew from the class registration confirmation that everything should be ready for us when we arrived, and as you can see from the photos, it certainly was! My board was at my spot at the work table with the prepared vinyl stencil laying on top of it. We had been able to note who we wanted to sit with when we registered, so all 4 of our boards were at the same work table.
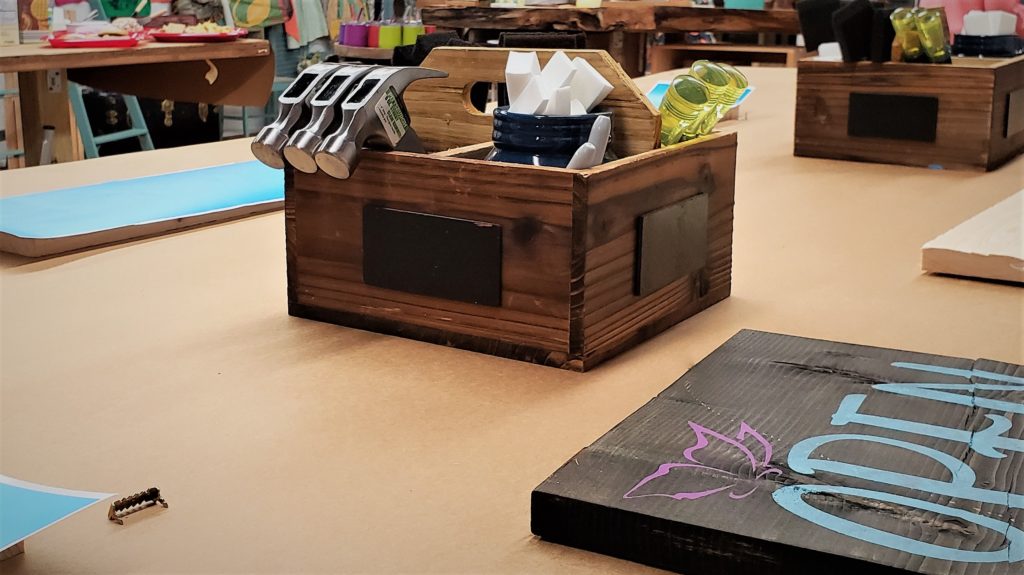
(above) my prepared project and (right) work table with projects and tools
Our first order of business was to take a look at the stencil to make sure it all looked OK before we began. You’ll start to see my word take shape in the coming photos… Next, we took various tools from the caddies on the table and began to add character to our boards. We whacked them with either the smooth or claw end of the hammer, a piece of chain, etc – anything that would give the board more of an antiqued/weathered texture. Once that was done, we sanded the boards lightly to remove any rough pieces that we might have created.
Staining the Board
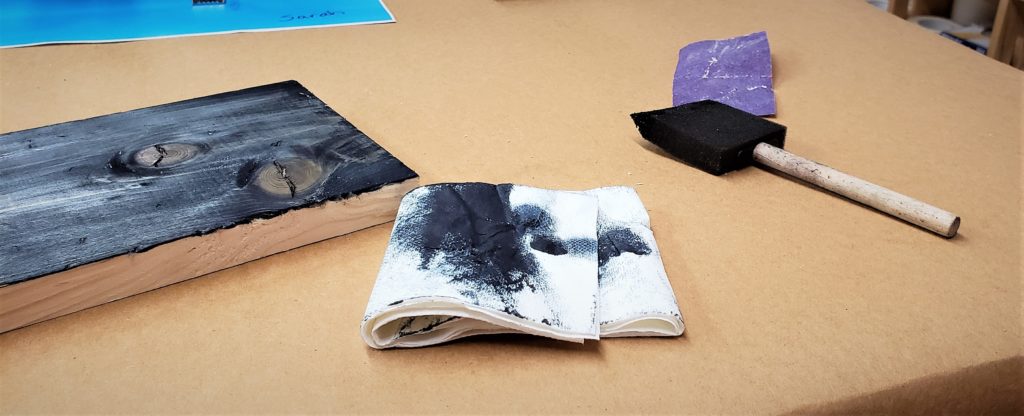
Next step was to stain the board. I was skeptical that we could stain AND paint the boards in one evening… My experience through other projects has been that the stain takes SOOOO long to dry! As it turns out, they use a water-based stain that dries VERY quickly. The depth of color isn’t about how much stain you add, which is what causes stain to take so long to dry, but more about how long you leave it on the board. This stain, with its water base, leaves a beautiful color and sheen on the board.
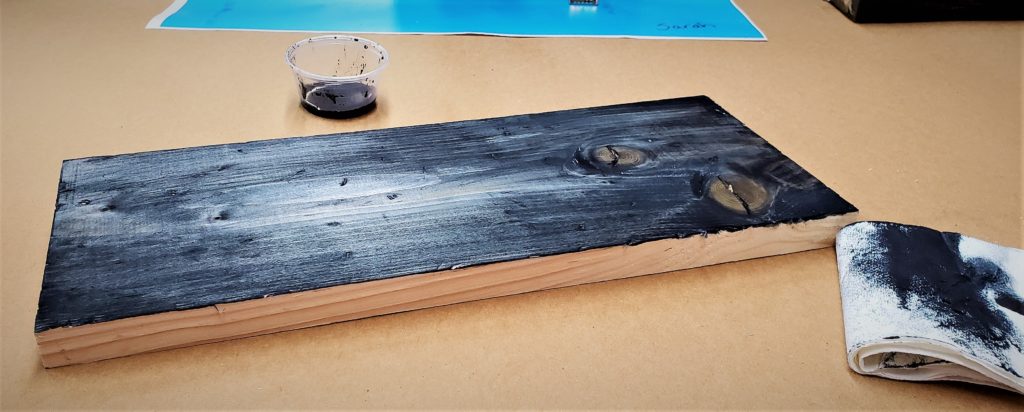
Using a basic foam brush, I brushed a very light amount of stain (I chose Marine Gray/Blue stain) on a small portion of the board, left it for a few seconds, then wiped it off with the paper towel provided. I continued this until the entire face of the board was covered. You can see from the cup that sits beside the board that very little stain had to be used! The color lightens a little as it dries.
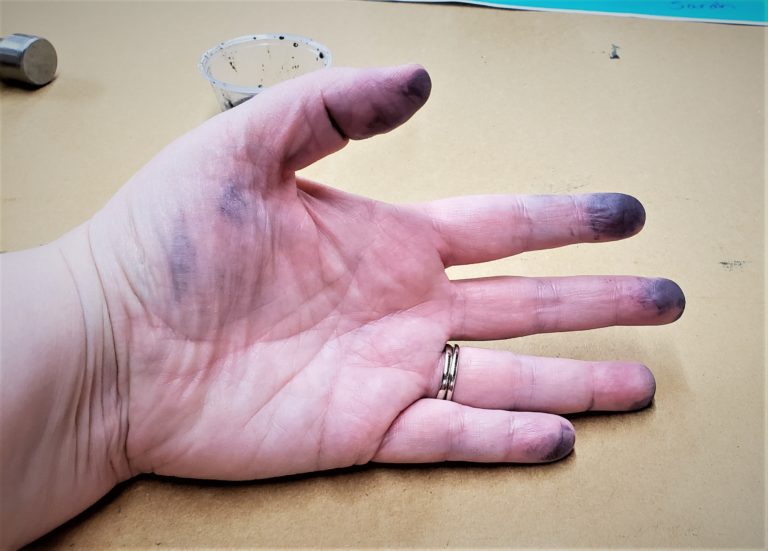
It’s not a very neat project, but 1) they do offer gloves, and 2) even if you don’t use those, the stain washes off very easily, since it is water-based.
Once the front was complete, I finished staining the edges with the same method. Michael then placed our boards in front of a small fan to dry while we worked on planning the remaining aspects of our respective projects. Most of us had chosen the same stain color, but Michelle had chosen a Charcoal stain that had more of a brown tint, while still pulling in gray-ish tones.
A Stencil Affair
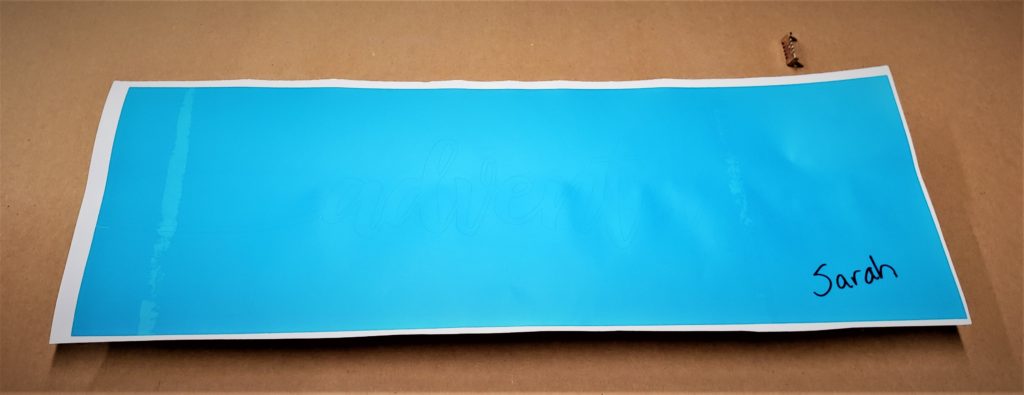
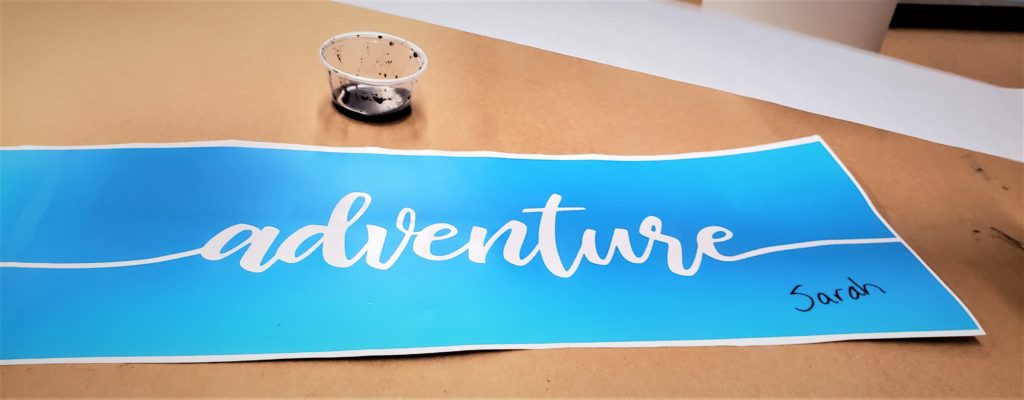
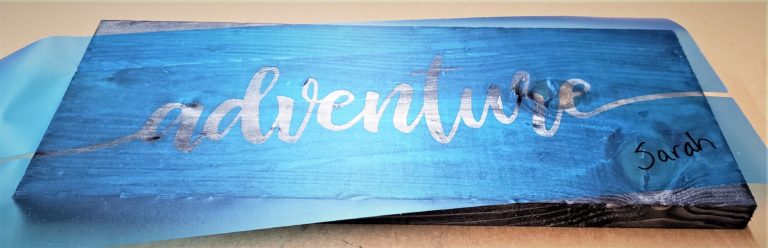
While the boards were drying, we began to work on revealing our stencil designs and get them ready to go onto the dried boards. First, we had to decide if we wanted the word in the paint color or the word in the wood color. That would determine what we pulled off the backing. For this specific project, we all chose to do the word in paint, so everyone’s process was the same – removing the word itself from the backing. Our teacher, though, was working on a logo project, and he had removed the background instead. I will not share pictures of his project on here, as his project was a gift, and I wouldn’t want to ruin the surprise for the person receiving it. Are you finally ready for my word? Here you go!
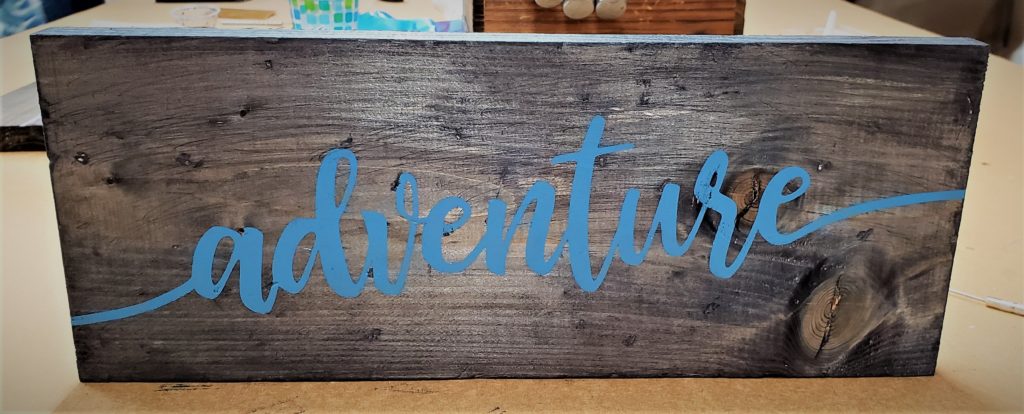
Why "Adventure"?
Well, this year is one of growth and adventure for us – from growing a blog to trying new things that we choose to do to navigating through new experiences that life brings to us – and this word will be a reminder of ALL of the adventures. Life is not always easy, and sometimes it isn’t fun, but it is about the journey. As people of faith, we have hope in Christ even in the midst of the less-than-exciting parts, but looking at even the “un-fun” experiences as part of the overall adventure is a positive perspective. Change is inevitable. It’s how you handle the change and adversity that determines your course.
Back to the Project
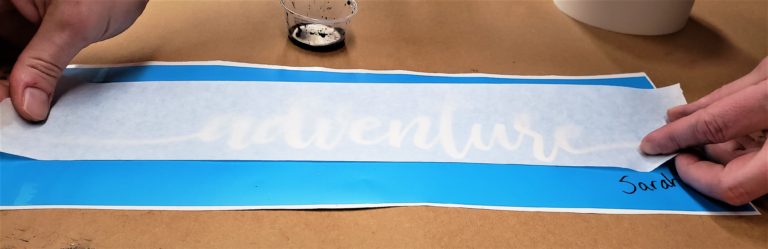
Back to project crafting in Atlanta… Once the design was revealed, the next step was to apply some transfer tape that would allow us to successfully place the stencil and all its little pieces onto our board. See all the loops for the A, D, V, E, R, and E? The tape was placed, then we pressed it firmly onto the stencil.
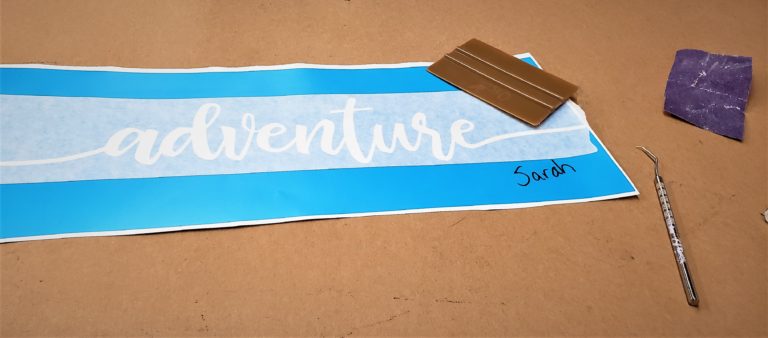
The squeegee helped press the tape firmly onto the stencil, removing air bubbles for firm adhesion.
This dental tool helped keep the small inner pieces from the loops in place as we removed one sticky portion after another. It would come in handy again later when the design was complete.
Pickin' Paint
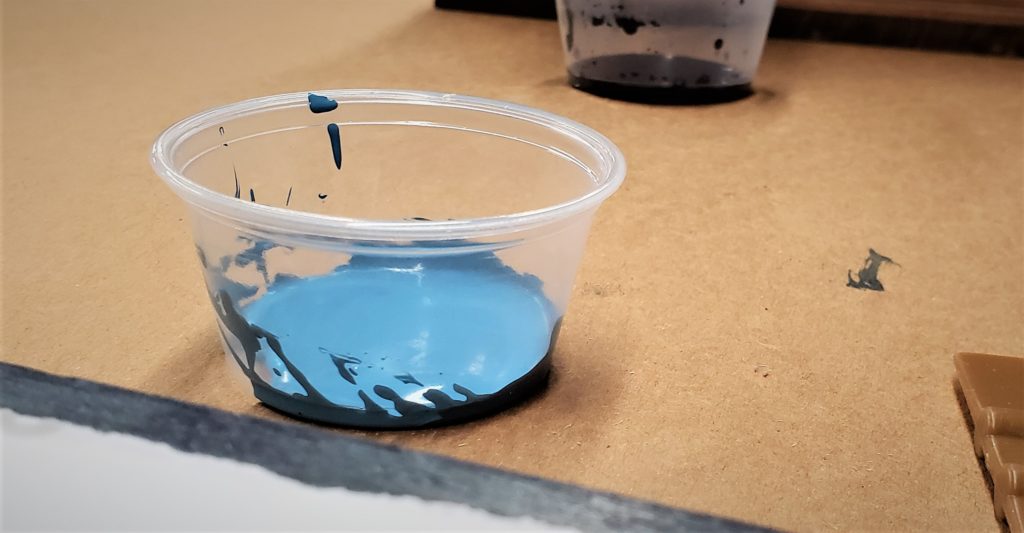
It was finally time to pick our paint colors! You should recall seeing the circles of paint color around the board earlier in this post. Lots of options! Our house has a lot of black, gray, and teal in the decor, so I wanted a medium-deep teal for my “one word” to go on the gray-blue-ish stain color. After reviewing the colors on the wall, none of them were the exact tone that I knew I needed. One was too dark, and the other was too blue and too light. Thankfully, since this is a very custom project, it is easy to blend paint colors to achieve what is desired.
Michael explained that some people even did an ombre effect on their designs, and that piqued Michelle’s interest! Below, I have circled in pink the colors that I had him blend for my project, which resulted in almost the perfect color! I was also happy that they used Behr paint. We have used that for almost all of our interior paint projects since we were married, and we have always had great success!
the left was too blue & light - the right was too dark & gray
Blended together, they were almost perfect!!!
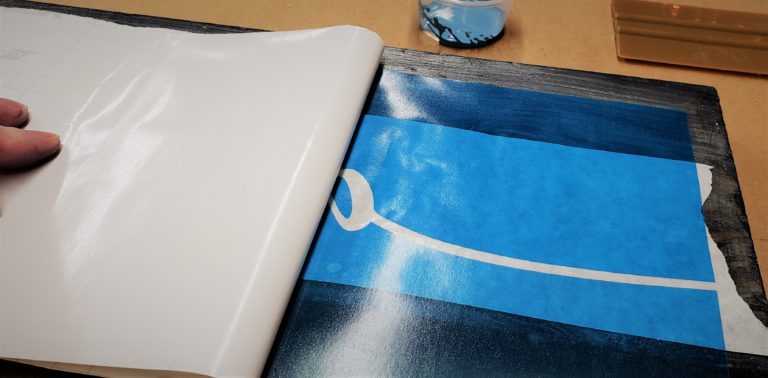
We removed the blue vinyl stencil from its backing, ensuring everything moved from the backing to the transfer tape. The trick was to keep it as flat as possible during the peeling process.
Next, we placed the stencil in whatever layout we chose on our board. I decided I wanted it at more of an angle, rather than straight across. You will see in later photos that the other three ladies went with a more straightforward approach.
Painting the Design
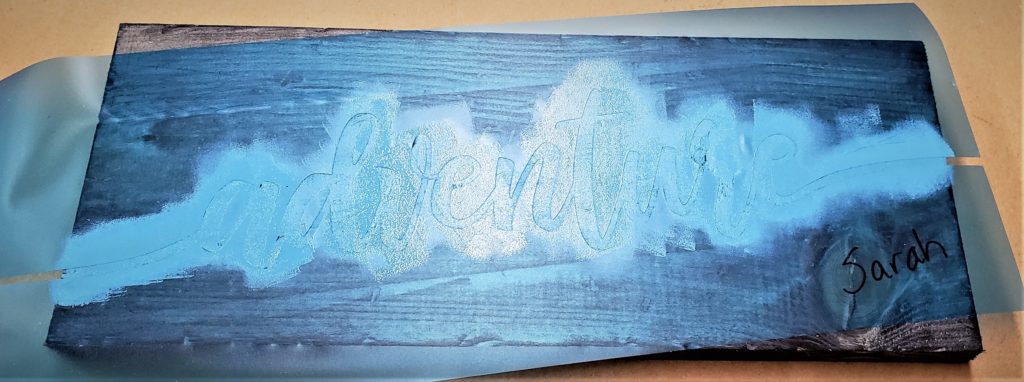
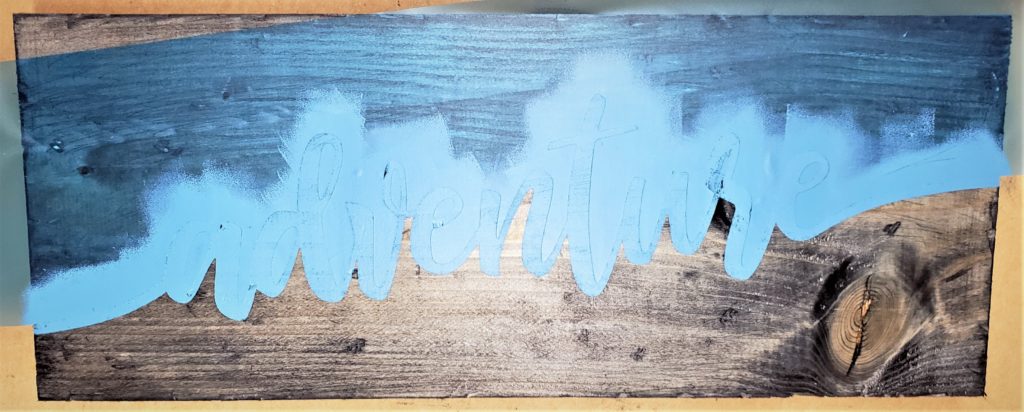
We painted across the stencil, using minimal paint and a stippling process (dab, dab, dab) to apply the paint to the area where wood was exposed. It took 2-3 very light coats, but by the time you went across the board, it was dry on the first end where you could immediate stipple the next layer. Easy peasy!
I did 3 layers to ensure all the wood spots were covered and advised Michael that I was done. He then placed the projects back in front of the fan to make sure they were completely dry before we began to remove the stencils. After just a few minutes of munching on a few more snacks (and a photo op!), the projects were ready for the finishing touches. We removed one side of the stencil, pulling across the grain of the wood rather than with it, then removed the other side of the stencil. After that, the dental tool came back out to help remove the tiny pieces.
My partners in crime for the evening - Michelle (l), Liz (c), and Barbara (r)
Finishing Touches
Starting to take shape…
The final result! I love it!
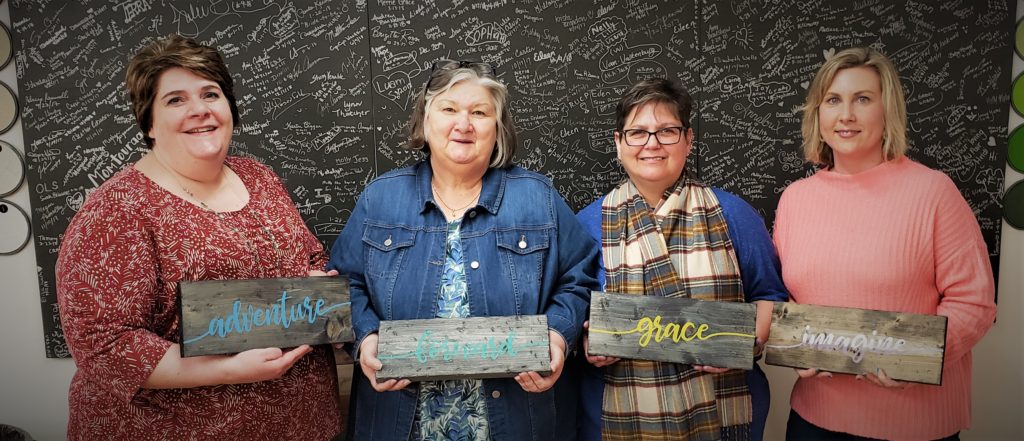
We all had such a blast doing our projects! Click through the gallery below, and you will be able to see the beauty of the different colors selected and the techniques used by each lady. Even though 3 of us had the Marine Gray/Blue, our boards ended up varying shades of the stain. You can also see the variance in the level of character we each added to our boards.
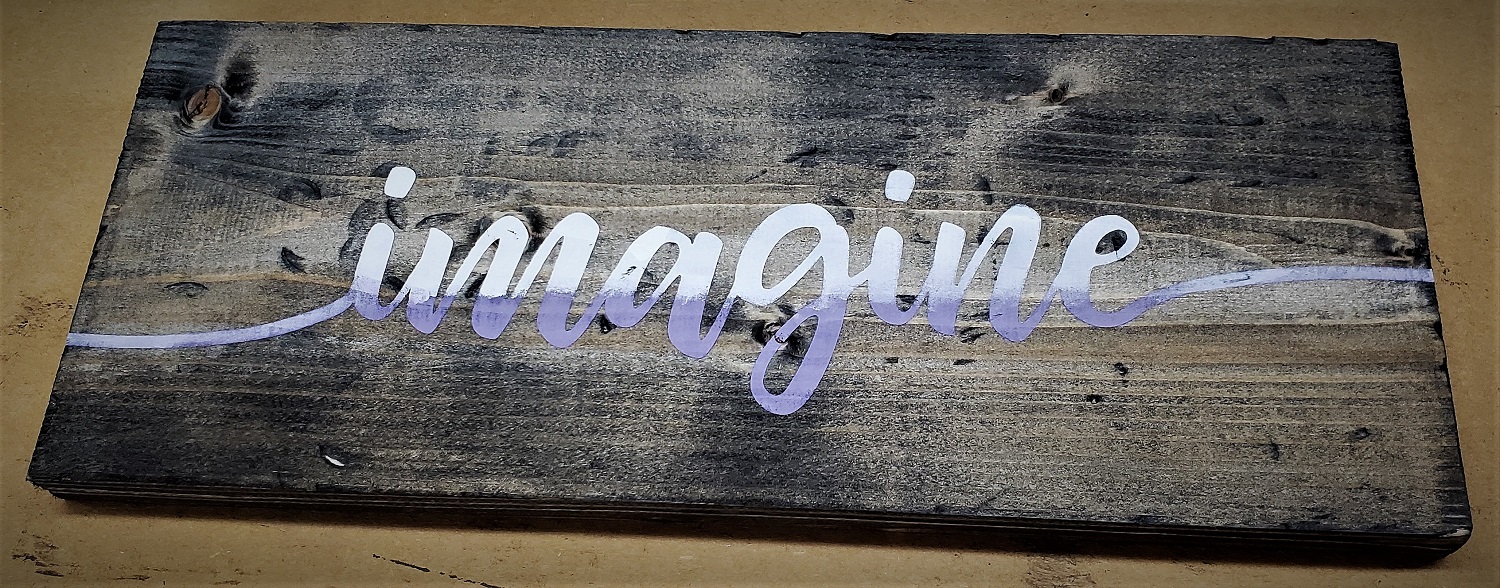
Michelle’s ombre project – from pale lavender to deep lavender
Barbara’s reminder to not dwell on the past
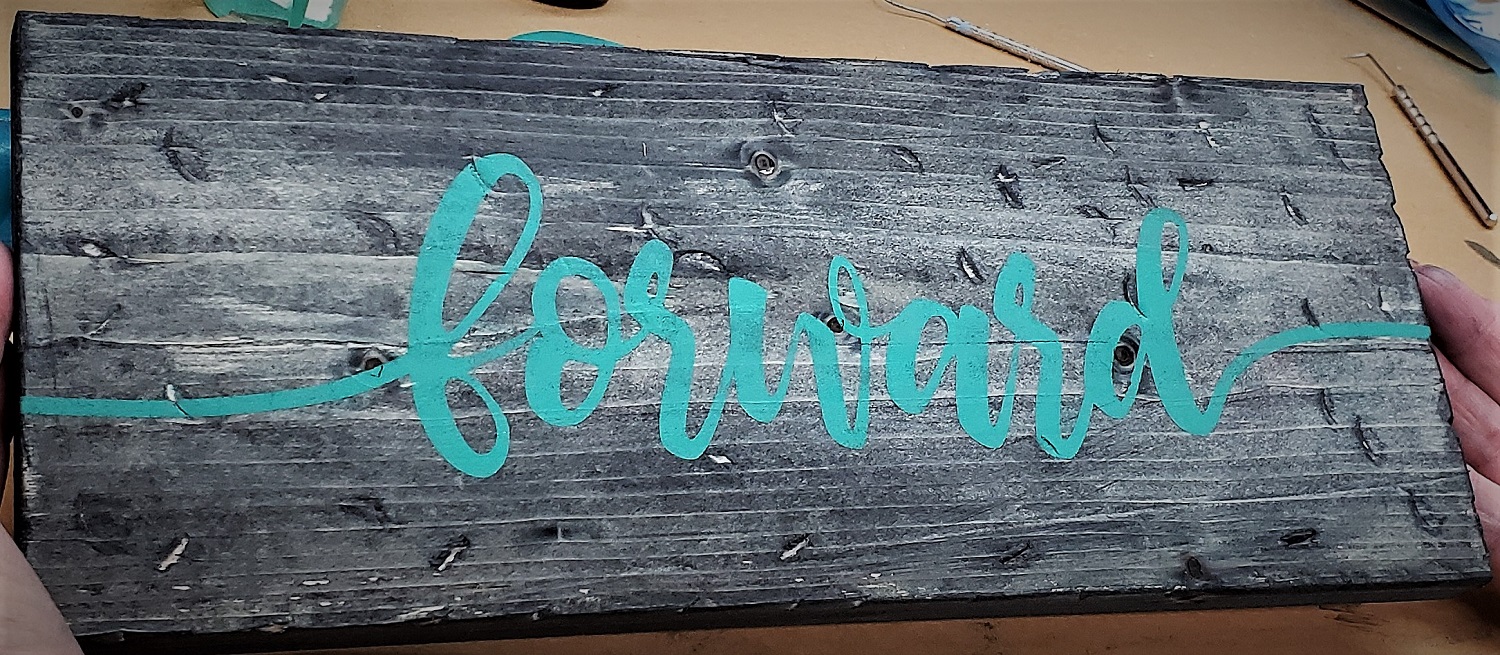
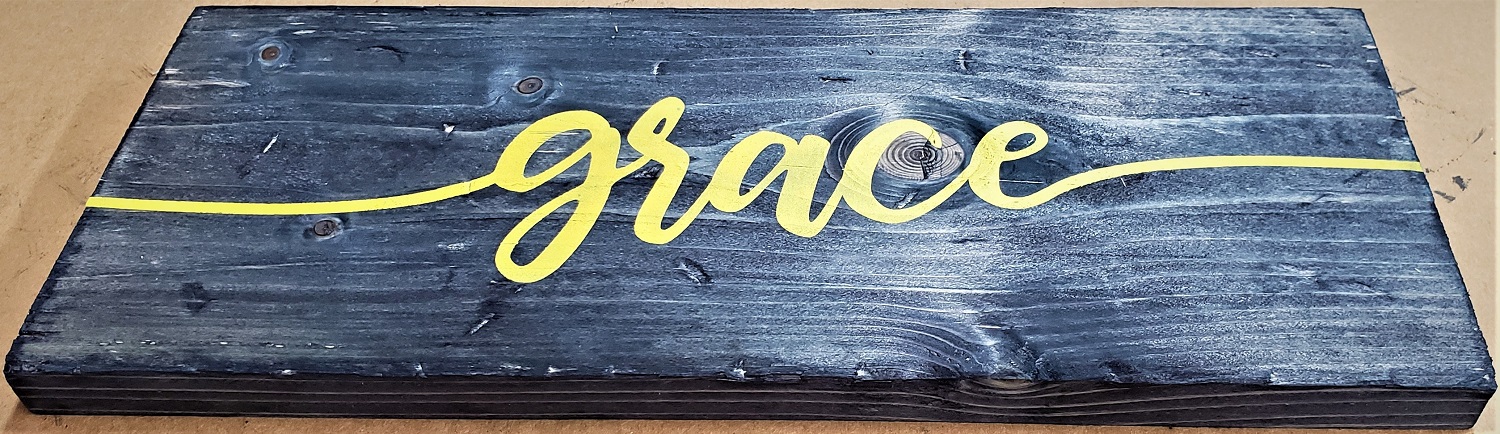
Liz’s reminder of the beauty of God’s grace – and the grace we should extend to others
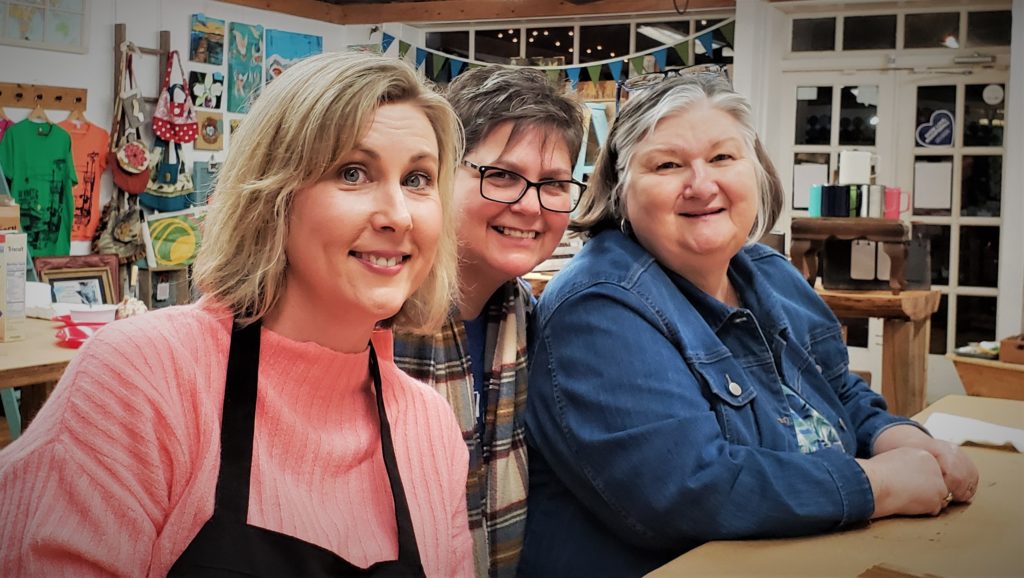
Finally, we ended with a group photo to show off our combined efforts:
This was such a FUN evening! Most of us don’t have the opportunity for much creativity in our day jobs. Being able to do something that was so easy from start to finish in less than an hour and a half at the end of a week of work was awesome! Crafting is stress relief! Michael was a really personable teacher, and we enjoyed the evening from start to finish.
Recommendation
For crafting in Atlanta, Custom Crafts by You was a great find! If you are local enough that Tucker isn’t out of reach, check out their classes online. They do all kinds of projects – from something for the kids, to this small project for adults, to mid-size and large (sometimes elaborate) works of art. You won’t be disappointed in your experience!
Leave us a comment to share whether you have been to Custom Crafts by You or plan to go soon.
3 thoughts on “Custom Crafts – by ME!”
Liz Swiecichowski
Awesome article Sarah thank you for doing this. We are planning another night out. I think we should start a club. It was so much fun. Catch you at the next event!

Awesome article Sarah thank you for doing this. We are planning another night out. I think we should start a club. It was so much fun. Catch you at the next event!
Great job on your craft! Love all the photos and process explanation. Looks like a great way to spend an evening!
Thanks, Jeanne! It definitely was!